

Right of Way (ROW) Permit Portal
Cityworks Public Access 6.2 for Right of Way permit applications guide.
1. Log In to Public Access
New users must apply for a login before they may use the site.
- To log in to Public Access, enter your username and password and click Log In.
- If you do not have an account, click Sign Up to create one.
ROW Portal Login
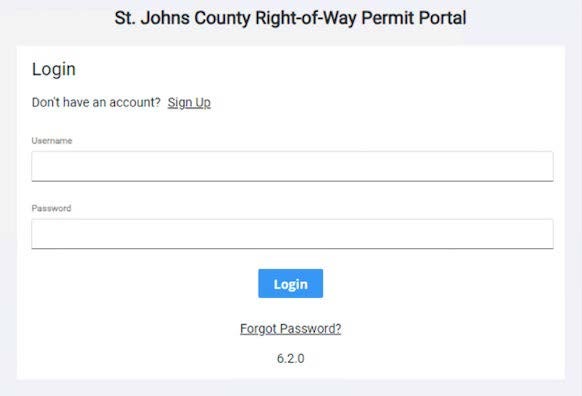
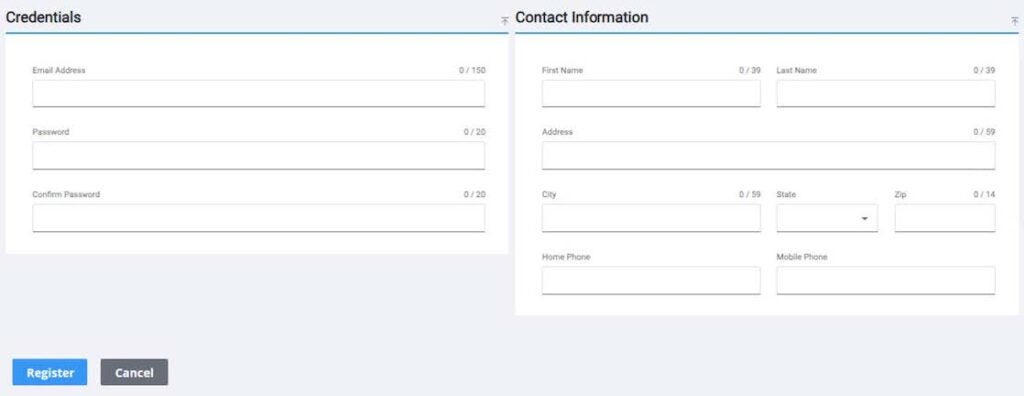
- Enter your email address, password, and contact information
- Click Register
Registration
- You will receive a confirmation email. Click the link in the email to activate your account. You may now log in and begin using Public Access.
1.1. Recover Your Password
If you cannot log in because you have forgotten your password, follow these steps to recover it:
- Click Forgot Password? on the login page.
- Enter your email address and click Submit.
Email Address
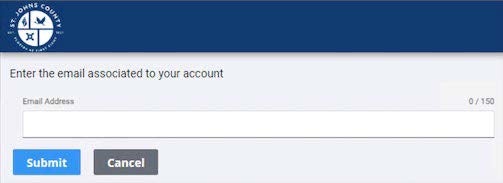
A notification shows to confirm that an email has been sent with instructions to reset your password.
2. Navigate Public Access
The Public Access home page is the first screen you see after logging in:
Homepage List of Cases
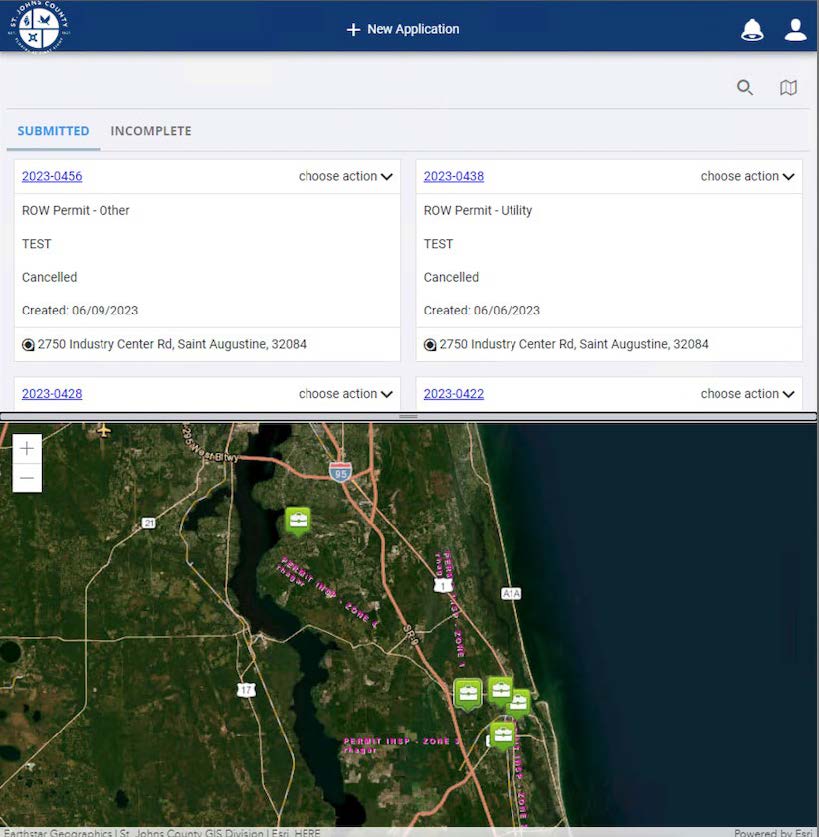
The home page displays a list of cases the user has opened and submitted. If the Administrator has posted any new notices or announcements on the message board, the bell icon next to the user menu turns red.
- Click the bell icon to view the message board.
- Click more to read more about the announcement.
Bell Icon

After any new messages have been viewed, the bell icon turns white again.
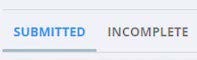
From the home page, users may view both submitted and incomplete applications and begin a new application.
Submitted and Incomplete
2.1. Access Your Account Information
From time to time, you may wish to update your account information. Users who use Public Access can access their account information from inside Public Access.
- Click the user menu in the upper-right corner
User Account Access

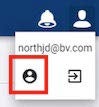
- Click the profile icon below your login name. This will open a box displaying your name and email address, as well as Account Details and Log Out buttons.
Account Details
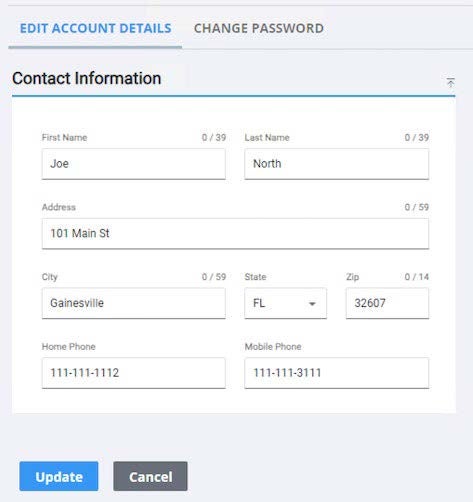
- Click Edit Account Details to view your account. From the Edit Account Details tab, you may update your name, address, and security question and answer. Enter your new account information and click Update.
Edit Contact Information
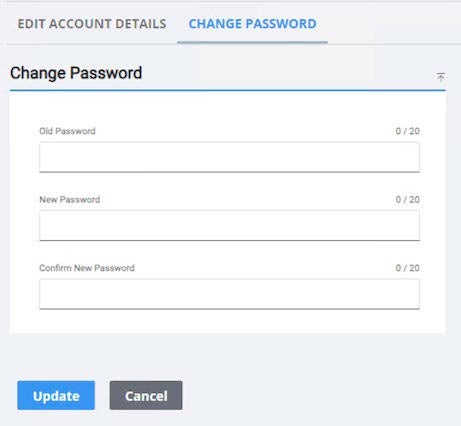
- Click the Change Password tab to create a new password for your account.
- Click Update
Change Password
- To return to the home screen, click the St. Johns County logo at the top left of the screen.
3. Begin A New Application
This topic walks you through the process of creating and submitting a Right of Way permit application.
- Click New Application
New Application

- Select the Right of Way category. Once selected, choose the ROW Permit that you want to create.
ROW Category
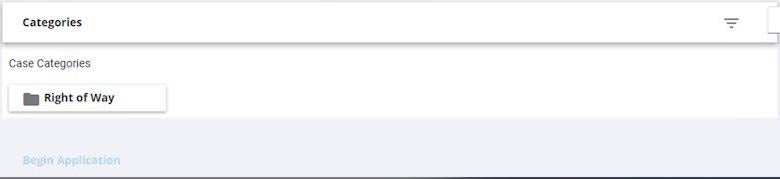
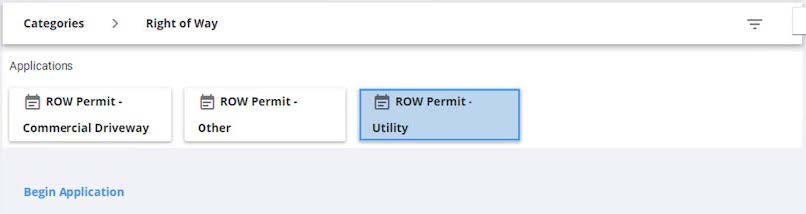
- Click Begin Application
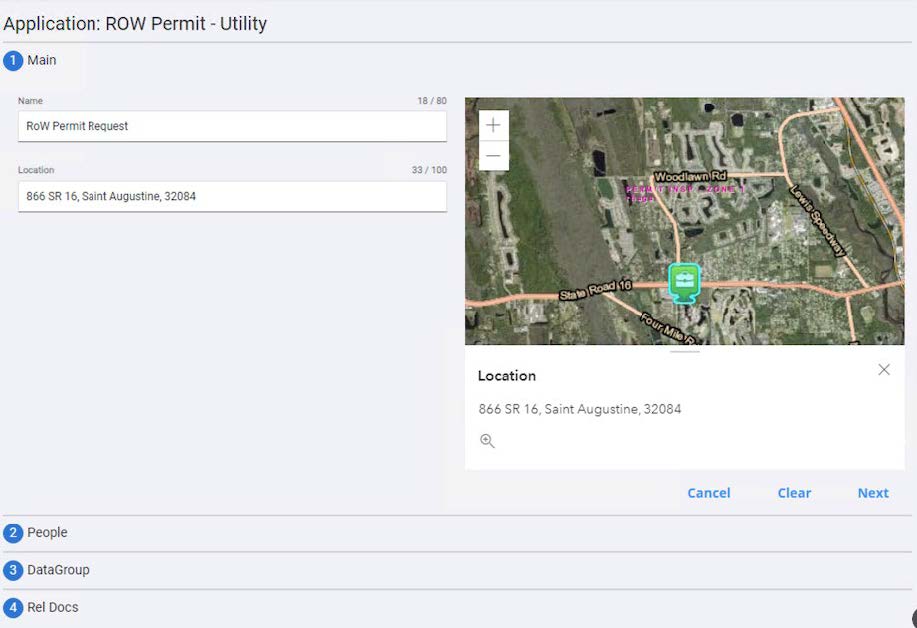
- The Main panel contains the name and location of the application. Enter a Name (i.e., a brief description) of the application.
- Enter the Location of the application. Once you have entered the address, the map displays the geographical location for your permit. Once your application is complete, you can open it at any time by clicking it on the map.
Main Panel Map Location
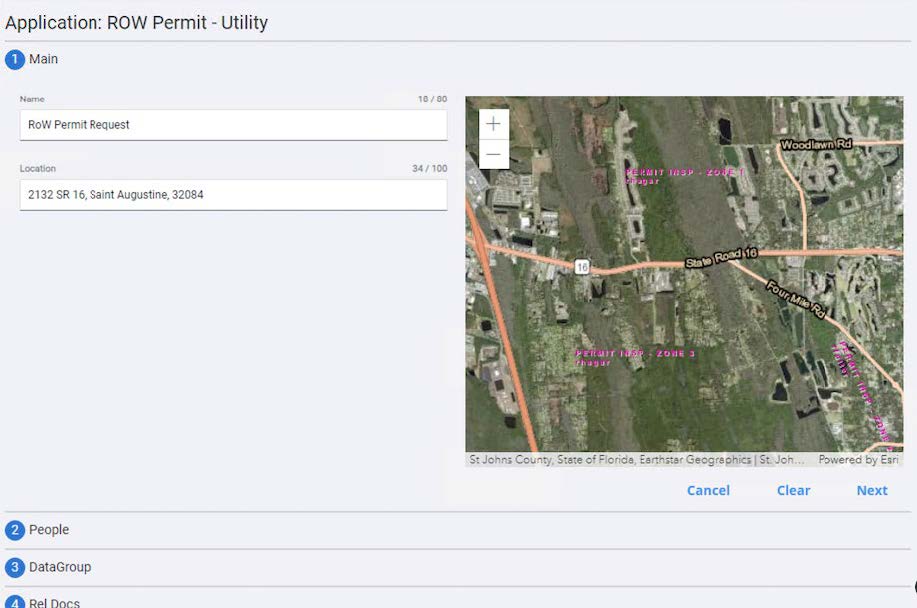
- You may also select a location by clicking the map. Doing so marks the location with a map pin and displays the address associated with that location.
Map Pin
- Click Next
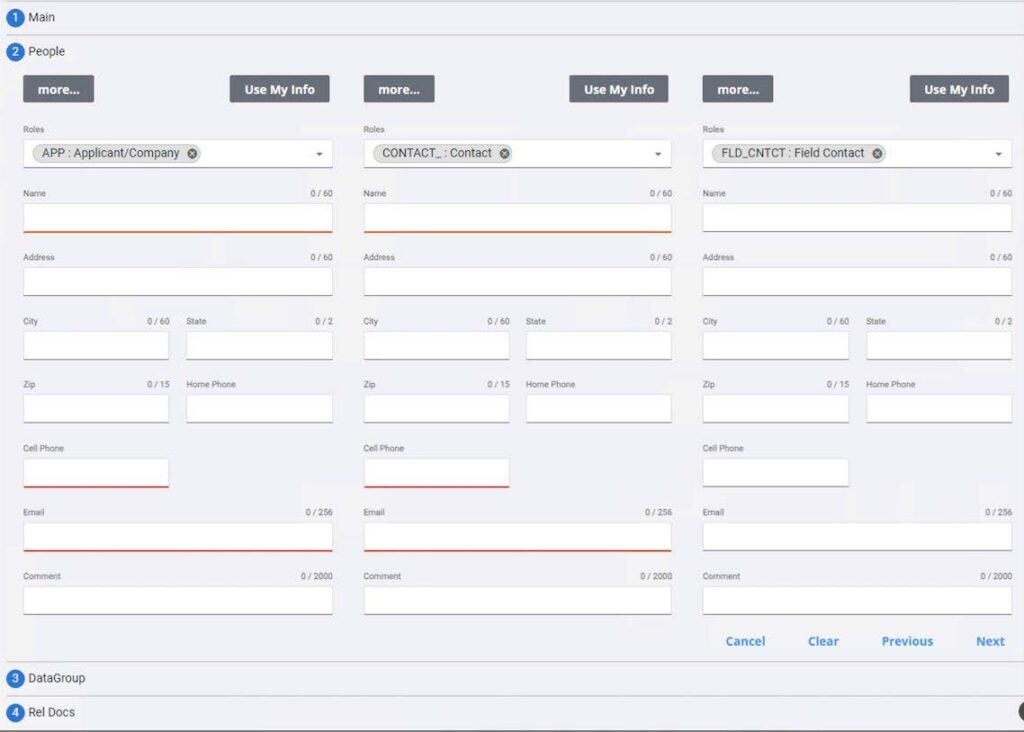
- The People panel is used to enter the name and contact information of people involved with the permit. Items in red are required fields. Enter information for each person.
- Click Use My Info to automatically enter the information from your user account into the corresponding fields.
- Click more or less to view more or less people fields. Required fields are always visible regardless of this setting.
People Panel
- Click Next
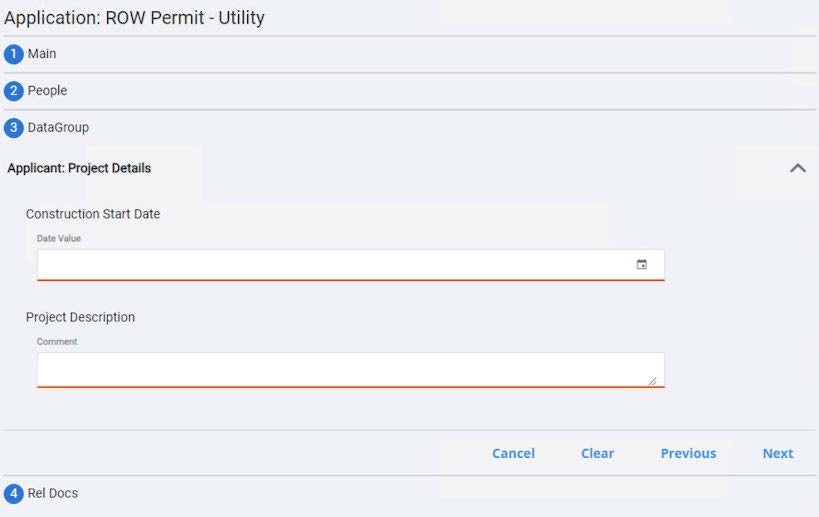
- The DataGroup panel requests specific information about your application. The fields here vary depending on the type of Right of Way permit chosen. Required fields are marked in red.
DataGroup Panel
- Enter the applicable information
- Click Next
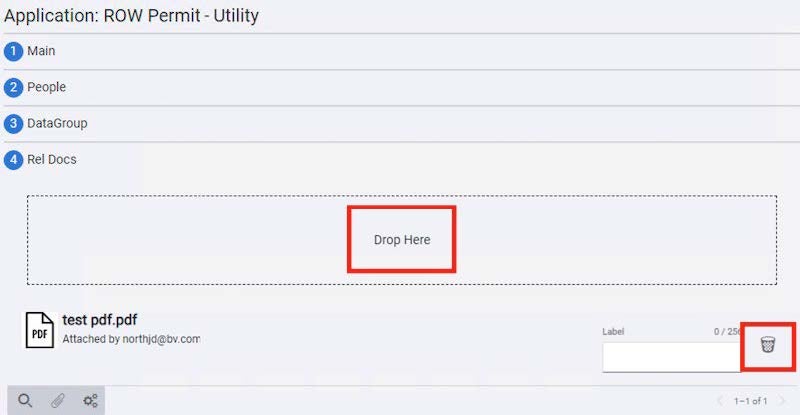
- The Rel Docs panel allows you to attach any relevant files to your permit application. To add an attachment, click in the box that says Drop Here to browse to the attachment or drag and drop the attachment in that same box.
- To remove an attachment, click Delete attachment next to the attachment. Once the case is created, attachments can only be removed by the user who added them.
Relevant Docs Panel
- Once all related documents have been uploaded, click Submit. This submits the application and takes you to the summary page for your case.
Submit

- Once submitted, your application can be reviewed and monitored, but the information submitted within the application cannot be changed. New related documents, however, can be uploaded after application submission.
4. Review Submitted Applications
4.1. Check the Status and Progress of Your Application
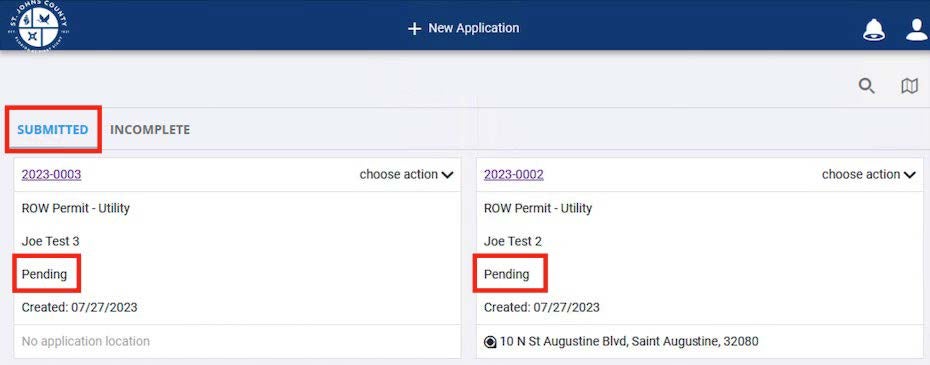
Once you submit an application, you can check on its progress any time. The Submitted tab shows your cases and the current status of the case appears below the application name. This status will change as your case progresses.
Current Case Status
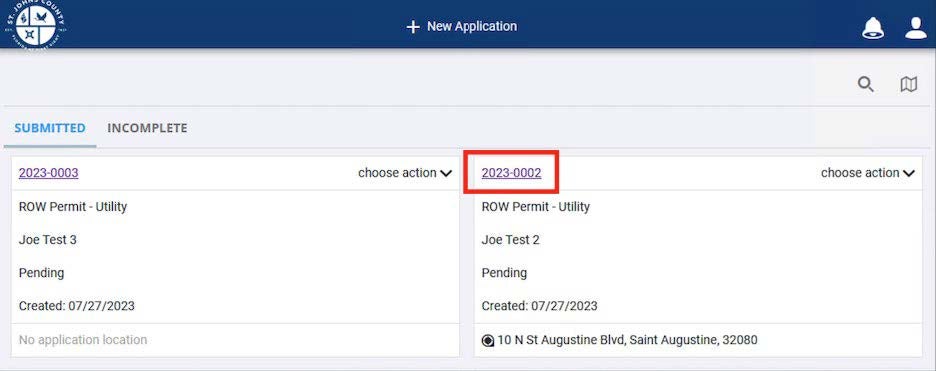
- Click the case number to open that case. You can also enter the case number in the search box at the top right of the page.
Case Number
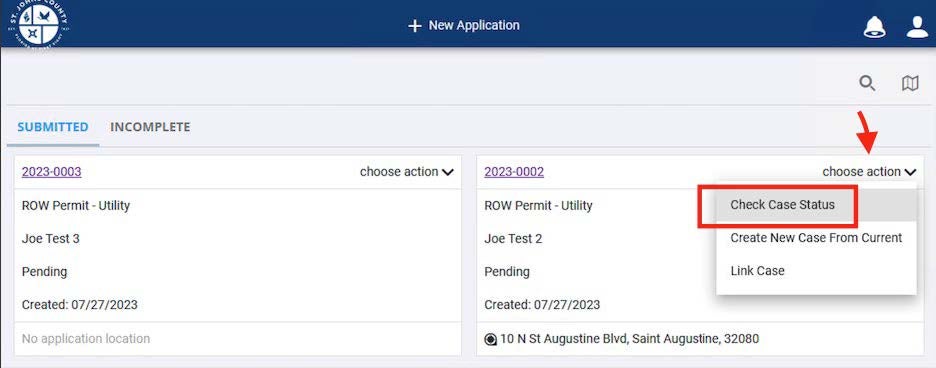
- To see more case details, click the choose action drop-down list and select Check Case Status. The Case Summary page opens
Case Summary
- In addition to displaying all data entered during the application process, the Case Summary screen allows users to track the progression of their case in the Workflow panel. This panel lists each task that must be completed, the estimated completion date for each task, the result of each task, and the date and time each task was completed.
Workflow Panel
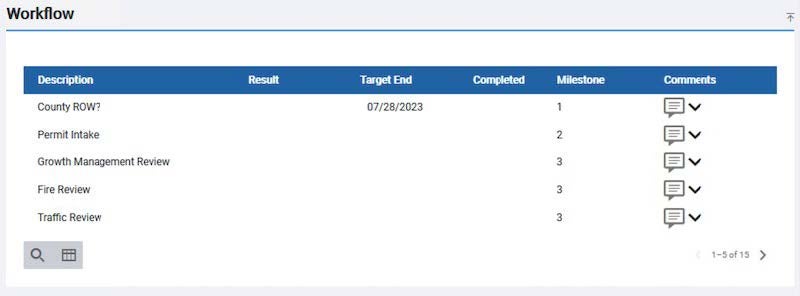
- Click on the down arrow next to the comment bubble icon to reveal any SJC staff comments about each step.
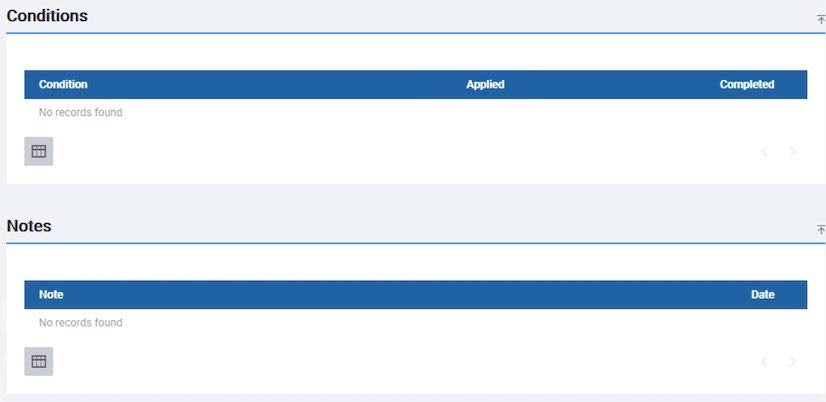
- The Case Summary screen also shows if any special conditions or permit-level notes have been added to your application.
Special Conditions and Notes
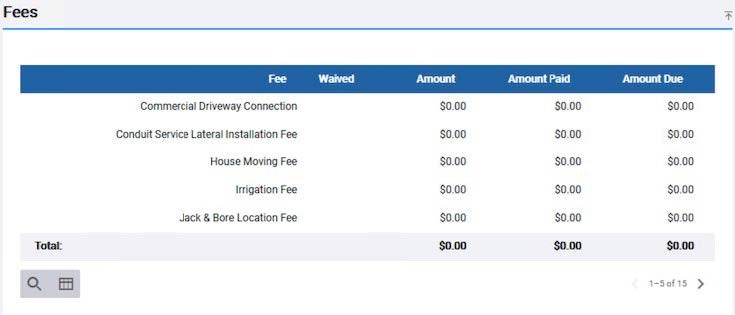
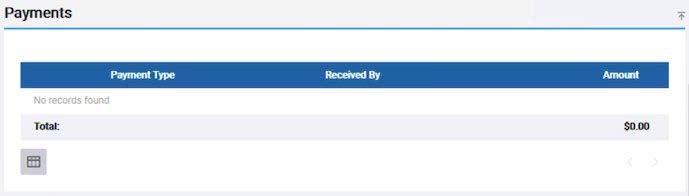
- Some permit applications (e.g., the Right of Way Permit – Other) contain a list of fees. These fees (and any payments that have been recorded by SJC) can be tracked via the Case Summary.
Fees
Payments
4.2. Create a New Application Based on the Current Application
Users can create child applications based on existing applications. This automatically populates the new application with selected data from the existing application.
- Make sure the home page is set to display submitted applications.
Submitted and Incomplete
- Scroll through the list of submitted applications or enter the application number in the search box at the top of the page.
- Click the choose action drop-down list and select Create New Case From Current.
Create New Case from Current
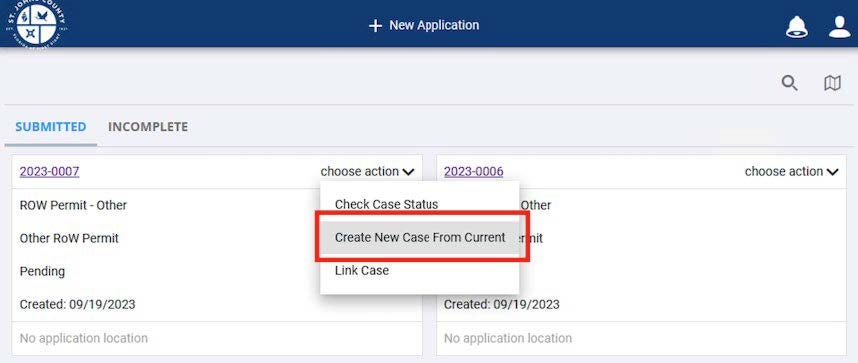
- Selecting this option takes you to the application selection page. Choose Right of Way.
- Choose your Right of Way permit type.
- Click on Create Child Application
Create Child Application
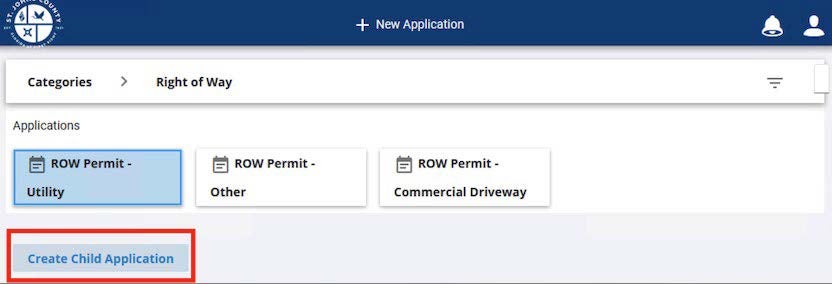
- PLL will create and submit the new child permit with applicable data copied automatically from the parent permit
4.3. Add a Link to Another Application
Public Access users can create links between applications. Users can also specify if the link is a parent/child relationship or just a general relationship.
- Make sure the home page is displaying submitted applications
Submitted and Incomplete
- Scroll through the list of submitted applications or enter the application number in the search box at the top of the page.
- Click the choose action drop-down list and select Link Case
Link Case
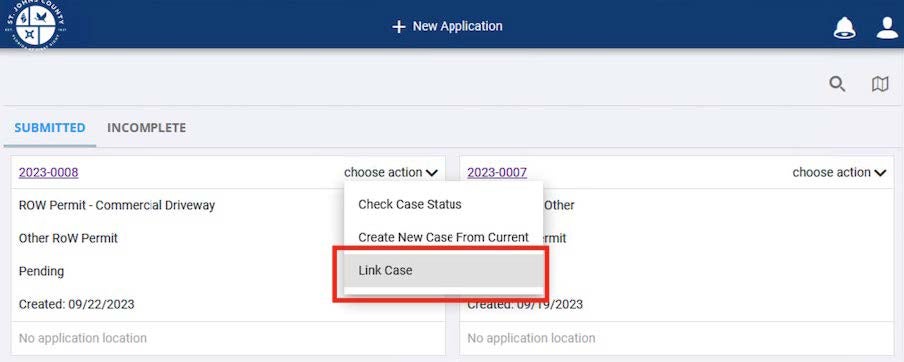
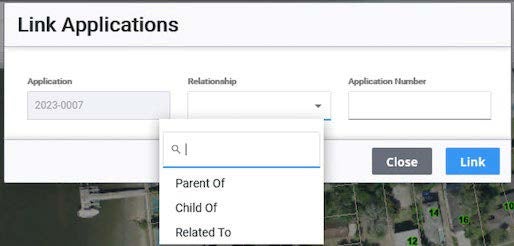
- On the Link Applications panel, the Application field displays the number of the case you are linking from. Use the Relationship drop-down list to select the kind of relationship that you wish to create between the two cases. Parent Of indicates the application you are linking from is the parent of the case you are linking to. Child Of indicates the application you are linking from is a child of the case you are linking to. Related To means there is not a parent/child relationship between the two cases but that they are still related.
Relationship Options
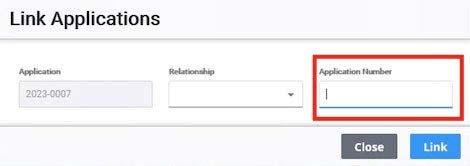
- In the Application Number field, enter the number of the case you want to link to. As you begin typing the case number, a list of cases matching what you have typed will appear. You may select the case you want from this list.
Application Number
- Click Link. The summary page for these applications will now include the Related Applications panel, which lists the other applications each case is linked to.
4.4. Remove a Link to Another Application
To remove a link between cases, follow these steps:
- Make sure the home page is displaying submitted applications
Submitted and Incomplete
- Select the application you want to modify by scrolling through the list of submitted applications or by entering the application number in the search field.
- Open the case so the summary page is displayed
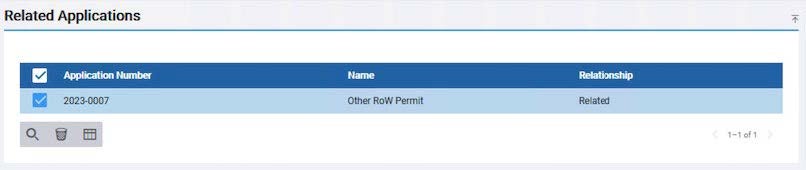
- Scroll to the Related Applications section of the Summary Page and select the link to be removed
Related Applications
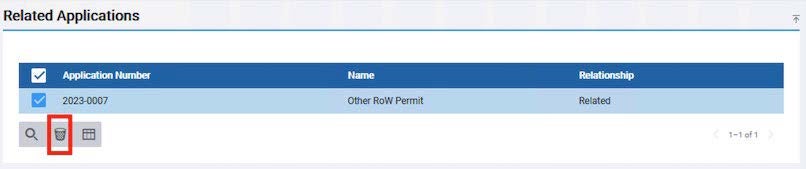
- Click the Delete selected records icon (trash can)
Delete Icon
- When the dialogue box asks if you want to remove the selected relationship, click Remove.
5. Finish an Incomplete Application
If you have applications that have not been completely filled out and submitted, you may find them by selecting the Incomplete tab on the home page.
Submitted and Incomplete
The panel below will now list all your incomplete applications. You may also open an incomplete application by clicking on it in the map. Incomplete applications are represented by a gray icon on the map.
Incomplete Application
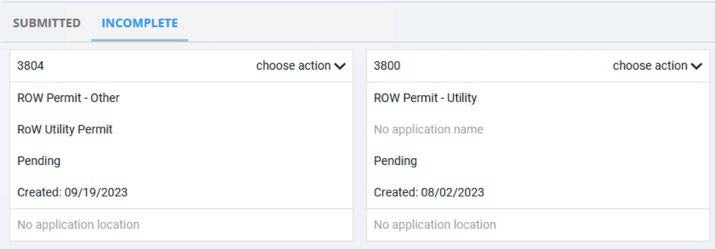
- Click the choose action drop-down list to either Continue Application or Delete Application.
Continue or Delete Application
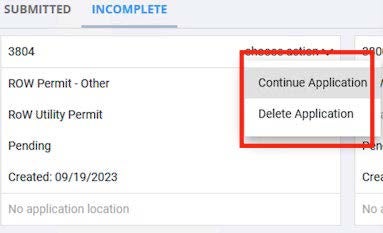
- Click Continue Application to open the application input screen
- Click Delete Application to discontinue the selected application and remove it from your Incomplete list
6. Map
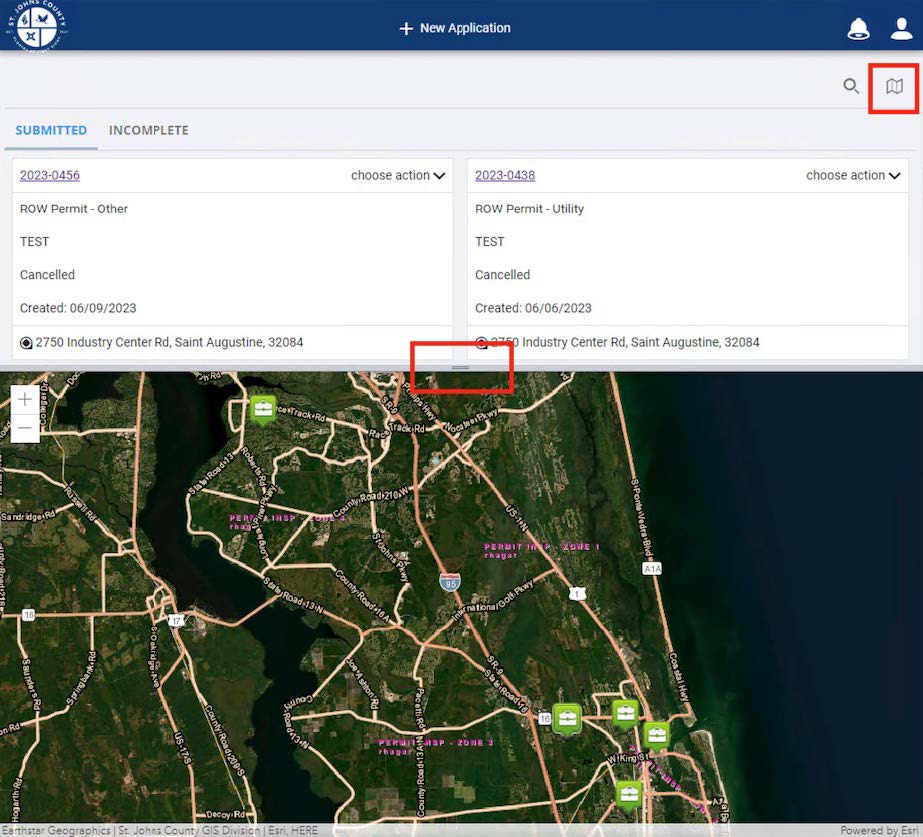
The map displays all your applications geographically. Green application icons represent your submitted applications and gray icons represent incomplete applications.
- Click the map icon to open or close the map
- Click and drag the slider bar to resize the map
Map Icon and Slider Bar
- The map has zoom controls in the top-left corner. Click the zoom in or zoom out icons to zoom in and out. If your mouse has a scroll wheel, you can also use it to zoom in and out.
- To pan in any direction, click and drag the map in the direction you want to pan or use the directional keys on your keyboard.
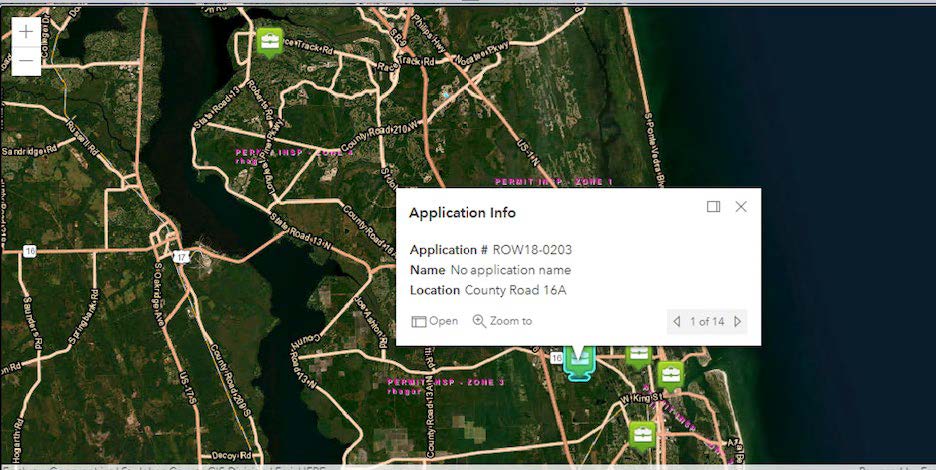
- Click an application icon to see more information. Click Open to open the application or zoom to the application’s location.
Application Info